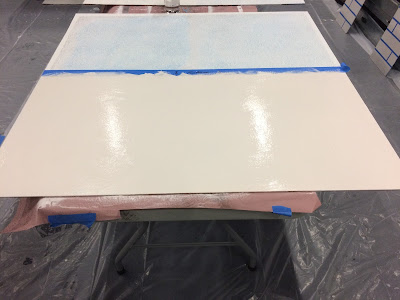
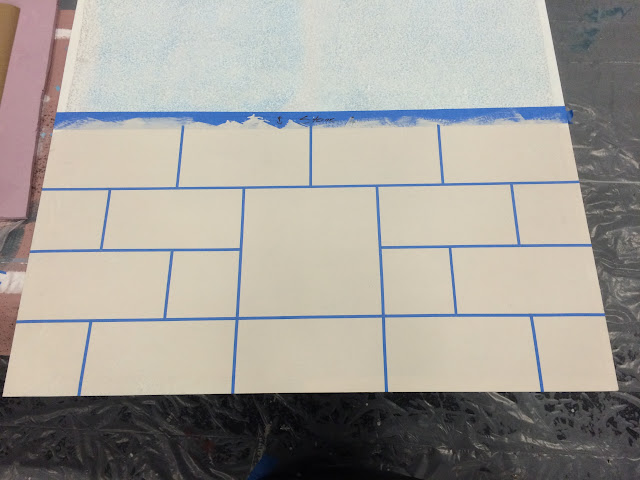
Once the "grout" was dry we took lengths of 1/2" painter's tape to mask the outline of our stone pattern, leaving a square in the middle. The medallion will eventually be pounced onto the square, but not until we've completed the rest of our base stone textures and are ready to put on the last touches. Below you can see how the pattern will turn out and get a rough idea of what the finished layout will look like. The third and fourth photographs below are examples of the next step. The base stone color was painted on over all the tape then sponged off for a weathered texture. At this point it was time to lay the piece out in front of the fans and focus on learning how to make the brick texture.
Wednesday, January 6, 2016
Day 3: Bricks and Stones - Stone
So I'm starting this blog on Day 3 of the scenic painting class due to the fact that for the first few days we were focusing on our basics and learning about the nature of the paints themselves. After finishing our crash course in the basics (sponge on/off, wet blend, priming, wood blocking, ombre), we're ready to tackle some more advanced techniques. For this stage of the process we started with a 4'x8' sheet of masonite taped in half and lay down a coat of primer, followed by a coat of grout grey.
As the grout color was drying, we took a medallion example and drew it
out onto a piece of brown paper. The drawing was then punctured by a
pounce wheel for us to use a charcoal pounce for a direct transfer onto a
dedicated 1'x1' square in the center of our stone wall. The circles were accomplished with a pair of compasses, then the floral patterns were sketched in by hand. If you look closely, you can see where I treated the drawing like cartography, drawing several lines to map out each quadrant of the pattern before inking the hard-to-read pieces with sharpie. You can see how the medallion will fit into the stone in the photos below.
Once the "grout" was dry we took lengths of 1/2" painter's tape to mask the outline of our stone pattern, leaving a square in the middle. The medallion will eventually be pounced onto the square, but not until we've completed the rest of our base stone textures and are ready to put on the last touches. Below you can see how the pattern will turn out and get a rough idea of what the finished layout will look like. The third and fourth photographs below are examples of the next step. The base stone color was painted on over all the tape then sponged off for a weathered texture. At this point it was time to lay the piece out in front of the fans and focus on learning how to make the brick texture.
Once the "grout" was dry we took lengths of 1/2" painter's tape to mask the outline of our stone pattern, leaving a square in the middle. The medallion will eventually be pounced onto the square, but not until we've completed the rest of our base stone textures and are ready to put on the last touches. Below you can see how the pattern will turn out and get a rough idea of what the finished layout will look like. The third and fourth photographs below are examples of the next step. The base stone color was painted on over all the tape then sponged off for a weathered texture. At this point it was time to lay the piece out in front of the fans and focus on learning how to make the brick texture.
Subscribe to:
Post Comments (Atom)


No comments:
Post a Comment